
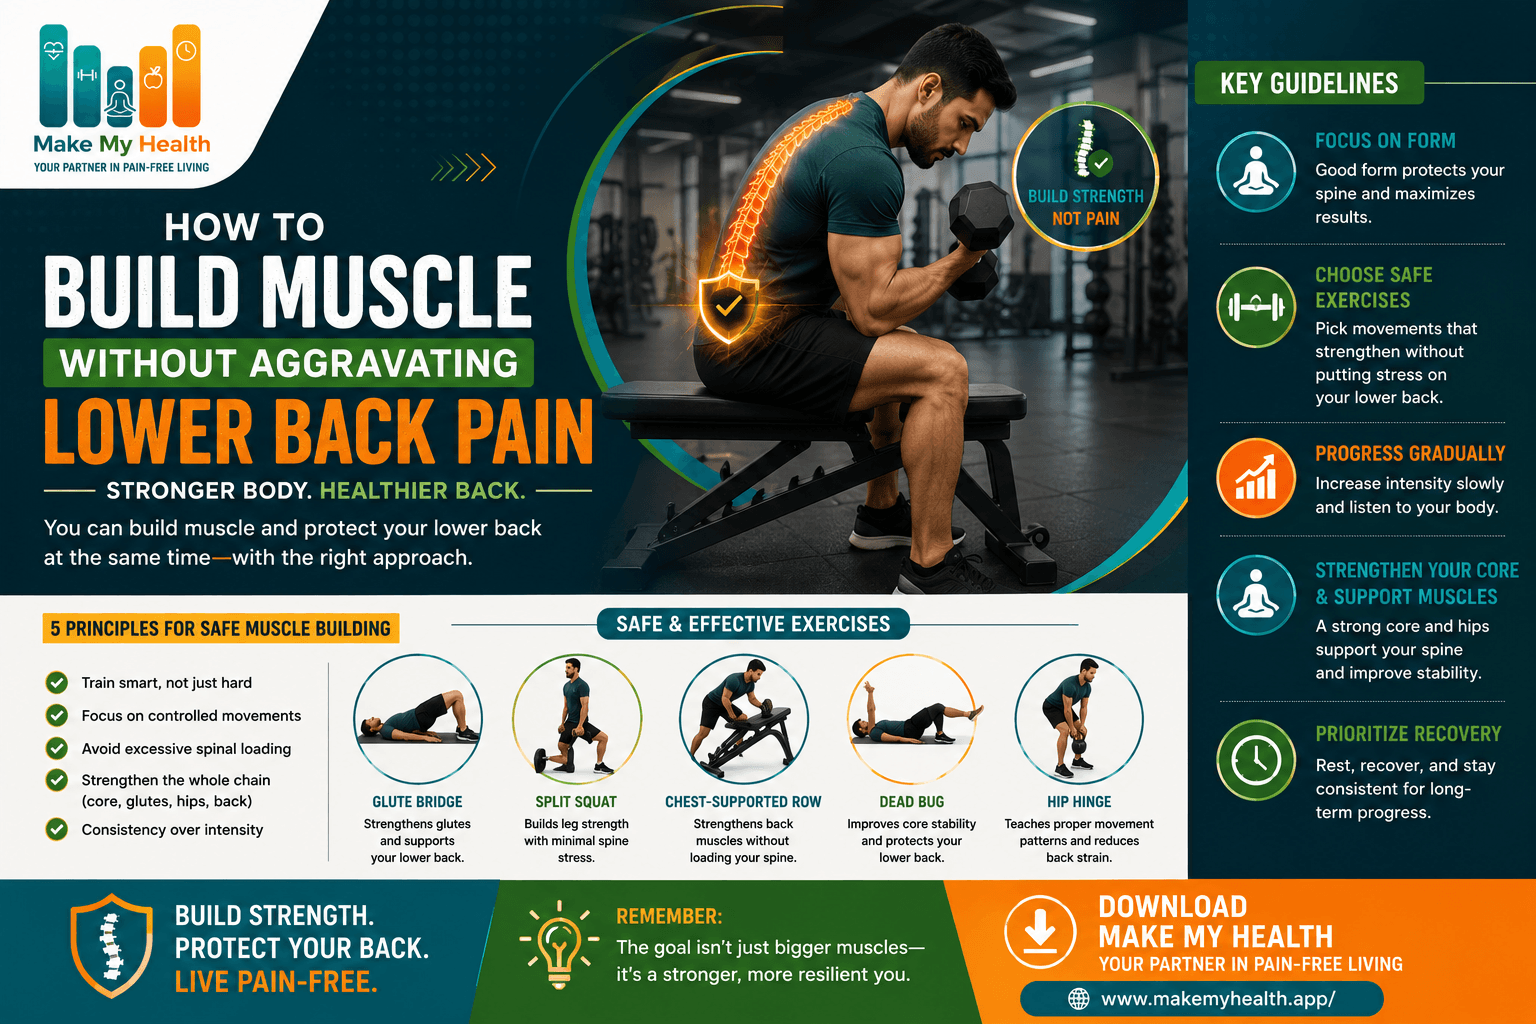
How to Build Muscle Without Aggravating Lower Back Pain
DisclaimerThis article is for general educational purposes and is not a substitute for professional medical advice, diagnosis, or treatment. Always consult a qualified healthcare provider for guidance specific to your condition.
Think lower back pain means you have to sacrifice muscle gains? Discover how you can build strength safely without sidelining your progress or your spine.
Introduction: The Relentless Challenge of Building Muscle with Lower Back Pain
Let’s face it, building muscle is already a massive challenge. Now add in the agony of lower back pain, and suddenly, the whole journey can feel like a nightmare. If you’ve ever winced just bending over to tie your shoes, you’re not alone. According to the National Institutes of Health, an astonishing 80% of adults will experience lower back pain at some point. It’s a real epidemic! The idea of lifting weights or pushing your limits can seem downright risky, maybe even terrifying.
But here’s the good news: you absolutely can build muscle without sending your back into a meltdown. The secret? Smart strategies, careful modifications, and a fearless awareness of both the risks and the spectacular rewards. Ready to find out how? Let’s dive in.
Step 1: Understand Your Lower Back Pain Because Ignorance Is Dangerous
Lower back pain isn’t just a one-note problem. Is your pain a sudden assault (lasting less than six weeks), or an insidious, chronic ache that just won’t quit? Figuring out what’s really going on, whether it’s a herniated disc, a muscle strain, or degenerative changes, can be the difference between a stunning comeback and a disastrous setback.
Table 1: Common Causes of Lower Back Pain
| Cause | Frequency (%) | Typical Symptoms | Exercise Precautions |
|---|---|---|---|
| Muscle Strain | 65 | Stiffness, soreness | Avoid heavy lifting |
| Herniated Disc | 15 | Radiating pain, numbness | Limit spinal flexion |
| Degenerative Disease | 10 | Chronic ache | Focus on low-impact moves |
| Other | 10 | Variable | Consult medical professional |
Knowing your enemy is half the battle. Most folks (around 65%) are dealing with muscle strains, so stabilization is your best friend, and heavy, reckless movements are your worst enemy. If you’re among the unlucky 15% with a herniated disc, be especially wary of anything involving twisting or crazy spinal flexion.
Step 2: Consult a Healthcare Professional Don’t Gamble with Your Recovery
Before you declare war on your weakness, get backup from an expert. Whether it’s a physical therapist, orthopedic doctor, or sports medicine whiz, a pro can help you dodge disaster. Shockingly, over 40% of gym injuries happen because people skip this crucial step or ignore their pre-existing conditions. Don’t be a statistic.
Key Points to Discuss with Your Provider
- The type and severity of your back pain
- Exercises you should absolutely avoid (these are your “no-go” zones)
- The safest way to progress in strength training
- Pain management strategies because suffering in silence is overrated
Step 3: Prioritize Core Stability Your Back’s Secret Weapon
A rock-solid core isn’t just about six-pack abs, it’s your lower back’s best defense against catastrophe. But not all core exercises are created equal. Some classic moves, like crunches and sit-ups, can actually trigger more pain, a nightmare scenario.
Table 2: Core Exercises—Safe vs. Risky
| Exercise | Safety for Back Pain | Sets/Reps Recommendation |
|---|---|---|
| Plank | High | 3 sets x 30 seconds |
| Bird-Dog | High | 3 sets x 10 reps |
| Dead Bug | Moderate | 2 sets x 12 reps |
| Sit-Ups | Low | Avoid |
| Russian Twists | Low | Avoid |
So why do planks and bird-dogs get the green light? They target the deep, stabilizing muscles like your transverse abdominis and multifidus without risky movement. Think of them as your invisible armor. Start with three sets of 30-second planks and ten bird-dogs per set to build an unbreakable foundation.
Step 4: Modify Compound Movements Lift Smart, Not Reckless
Squats, deadlifts, and bench presses are legendary for building muscle, but they can also be a recipe for disaster if you’re not careful. The trick? Ruthless modification. Traditional deadlifts or barbell squats can turn lower back pain into an all-out crisis.
Safer Alternatives and Adjustments
- Goblet Squats: Keep your torso upright and your back happy.
- Trap Bar Deadlifts: The neutral grip and upright stance are a lifesaver for your lumbar spine.
- Split Squats: Isolate each leg and keep your back out of the danger zone.
- Bench Press: Stay grounded, feet flat, no dramatic arching.
Step-by-Step: Modifying a Squat
- Pick goblet squats over barbell squats, less risk, same reward.
- Hold a dumbbell (10–30 lbs to start) at chest level.
- Stay tall, keep your torso as vertical as possible.
- Lower yourself slowly, making sure your knees track over your toes.
- Aim for 3 sets of 12–15 reps, feel the burn, not the pain.
Step 5: Emphasize Machine-Based Exercises Your Safety Net
Weight machines are an absolute game-changer if you’re haunted by back pain. They guide your movement, protect you from poor form, and dramatically slash your risk of disaster.
Table 3: Recommended Machine Exercises
| Machine | Muscle Groups | Back Safety | Typical Weight Range |
|---|---|---|---|
| Leg Press | Quads, Glutes | High | 50–120 lbs |
| Seated Row | Back, Arms | High | 40–80 lbs |
| Chest Press | Chest, Triceps | High | 40–100 lbs |
| Lat Pull-down | Back, Biceps | Moderate | 45–85 lbs |
Machines like the leg press let you train your lower body with power without risking a spinal catastrophe. Seated rows and chest presses give you a muscle-building bonanza for your upper body, minus the lumbar drama.
Step 6: Incorporate Isolation Movements Target, Build, and Protect
When your back is vulnerable, isolation exercises are your secret weapon for muscle growth. Moves like bicep curls, tricep extensions, and calf raises let you sculpt your physique without putting your back in jeopardy.
Examples and Recommendations
- Bicep Curls: Grab some dumbbells (8–20 lbs), 3 sets of 12 reps.
- Tricep Extensions: Use cables or dumbbells (10–15 lbs), 3 sets of 10 reps.
- Calf Raises: Go with bodyweight or light dumbbells (up to 20 lbs), 3 sets of 15 reps.
Mix these into your weekly routine for relentless muscle gains without the terror of a flare-up.
Step 7: Focus on Proper Warm-Up and Cool-Down Your Armor Against Injury
Skipping your warm-up? That’s a recipe for disaster. Think of your warm-up as a force field, it boosts blood flow, loosens up stiff muscles, and gets your nervous system ready to crush your workout safely. Cooling down is just as magical for reducing soreness and accelerating recovery.
Step-by-Step: Ideal Warm-Up Routine
- Start with 5 minutes of brisk walking or easy cycling.
- Dynamic stretches: hip circles, arm swings, gentle torso rotations.
- Core activation: 2 sets of bird-dogs (10 reps each).
- Stretch hamstrings and glutes for 30 seconds per side.
Step-by-Step: Effective Cool-Down Routine
- Walk slowly for 3 minutes, let your heart rate drift down.
- Static stretches: hold each (hamstring, hip flexor, quadriceps) for 30 seconds.
- Deep breathing: 5–8 slow, calming breaths.
Step 8: Monitor Intensity and Volume Progress Without Sabotage
Muscle growth thrives on progressive overload, but with a volatile lower back, reckless increases are a trap. The golden rule: never increase weight or reps by more than 10% per week. This slow-burn approach is your insurance against setbacks.
Table 4: Safe Progression Guidelines
| Week | Weight Increase (%) | Rep Increase (%) | Rest Between Sets (min) |
|---|---|---|---|
| 1 | 0 | 0 | 2 |
| 2 | 5 | 5 | 2 |
| 3 | 10 | 10 | 2 |
| 4 | 10 | 10 | 2 |
Suddenly, massive jumps are a back’s worst nightmare. Steady, mindful progression is your ticket to triumph.
Step 9: Use Supportive Equipment, but Don’t Get Addicted
Supportive gear like weight belts, lumbar braces, and cushioned mats can give you a backbone of confidence. But beware: over-reliance turns these tools from a safety net into a crutch.
Common Equipment and Its Benefits
- Weight Belt: Provides lumbar support during heavy lifts (use above 70% max effort).
- Lumbar Brace: Stabilizes your spine during risky moves.
- Cushioned Mat: Shields your back during floor work.
Remember, gear is a bonus, not a replacement for rock-solid form and relentless core strength.
Step 10: Adapt Recovery Strategies Muscle Isn’t Built in the Gym Alone
Muscle isn’t built while you’re lifting, it’s built while you recover. If you’re wrestling with back pain, recovery deserves ruthless attention. Prioritize sleep (7–9 hours), stay hydrated (aim for at least 2 liters), and don’t skip those gentle mobility moves like yoga or foam rolling.
Step-by-Step: Recovery Protocol
- Sleep: Target 8 hours every night. It’s your body’s repair shop.
- Hydration: Sip water all day long (2–2.5 liters).
- Mobility: Stretch and foam roll for 10–15 minutes post-workout.
- Pain Management: Use ice, heat, or anti-inflammatories as your healthcare pro recommends.
Recovery is your secret weapon, neglect it, and you’re sabotaging your progress.
Step 11: Track Progress and Adjust Accordingly Listen to Your Body’s SOS
Muscle growth and pain aren’t static, they’re a moving target. Keep a log of your workouts, weights, reps, and pain levels (on a 1–10 scale). If your pain spikes by more than two points after a session, that’s a flashing red warning light: dial it back!
Table 5: Example Progress Tracker
| Date | Exercise | Weight (lbs) | Reps | Pain Level (1–10) | Notes |
|---|---|---|---|---|---|
| 2024-06-01 | Goblet Squat | 20 | 12 | 3 | Felt stable |
| 2024-06-03 | Seated Row | 50 | 10 | 4 | Mild soreness |
| 2024-06-05 | Leg Press | 80 | 8 | 2 | No pain |
Review your data weekly or bi-weekly. This vigilance ensures you’re conquering your goals without triggering a crisis.
Conclusion: Build Muscle Don’t Sacrifice Your Back
With the right approach, you can absolutely build muscle without turning your lower back pain into a relentless nightmare. Embrace safe exercises, monitor your intensity like a hawk, and be vigilant about recovery. Remember: smart, consistent effort leads to sensational results without the agony.
If you’re serious about conquering your muscle-building goals, don’t let back pain dictate your limits. Arm yourself with knowledge, adapt with courage, and triumph one rep at a time.
Ready to transform your fitness journey? Got questions, or want to share your story? Drop a comment below, we’re here to help you conquer your goals, pain-free!
Conclusion:
Building muscle with lower back pain is entirely possible when approached with caution, knowledge, and adaptability. By understanding your unique situation, consulting healthcare professionals, prioritizing core stability, and making thoughtful modifications to traditional exercises, you can safely work toward your fitness goals. Emphasizing machine and isolation movements, warming up properly, monitoring intensity, using supportive gear wisely, and focusing on recovery all play essential roles in your success. Remember, progress should never come at the expense of your spine. Listen to your body, track your journey, and adjust as needed for long-term strength and resilience.
FAQ:
-
Can I still do squats and deadlifts if I have lower back pain?
Yes, but traditional barbell squats and deadlifts should be modified. Safer alternatives like goblet squats and trap bar deadlifts reduce lower back strain. -
Are there any core exercises I should avoid with lower back pain?
Avoid exercises that involve excessive spinal flexion or twisting, such as sit-ups and Russian twists. Planks and bird-dogs are safer options. -
How do I know if an exercise is worsening my back pain?
Track your pain levels before, during, and after workouts. If pain increases by more than 2 points on your pain scale after exercise, reduce intensity or try a different movement.
Stay updated
Get new health articles on WhatsApp
By subscribing, you agree to receive health updates via WhatsApp. Unsubscribe anytime.